


Showing posts with label Baking. Show all posts
Showing posts with label Baking. Show all posts
Monday, December 19, 2011
Vanilla Yoghurt Buttercake
This recipe is a keeper. You know it's a keeper when you've substituted an ingredient and it still works. Here I've substituted milk with yoghurt. This was out of necessity really as I've ran out of milk. It turned out beautifully, moist and tender. The yoghurt also added a bit of a tang and gave it a lift. Really yummy!

My Daughter G couldn't stop eating this cake. Not to toot my own horns, I think this yoghurt version tastes even better than the original one. My dear Hubby on the other hand loves the orginal version. Well, to each his own!
Vanilla Yoghurt Buttercake
(Recipe adapted from Simple Indulgence)
3 egg yolks
1½ tsp vanilla extract
¼ tsp salt
125ml plain yoghurt
175g cake flour
1½ tsp baking powder
3 egg white
40g castor sugar
Notes:
Original recipe uses milk instead of plain yoghurt.
Preparation:
Grease and line a 7” round cake pan with parchment paper.
Pre-heat oven at 200°C.
Method:


My Daughter G couldn't stop eating this cake. Not to toot my own horns, I think this yoghurt version tastes even better than the original one. My dear Hubby on the other hand loves the orginal version. Well, to each his own!
Vanilla Yoghurt Buttercake
(Recipe adapted from Simple Indulgence)
Ingredients:
150g unsalted butter, cut into cubes at room temperature
100g castor sugar3 egg yolks
1½ tsp vanilla extract
¼ tsp salt
125ml plain yoghurt
175g cake flour
1½ tsp baking powder
3 egg white
40g castor sugar
Notes:
Original recipe uses milk instead of plain yoghurt.
Preparation:
Grease and line a 7” round cake pan with parchment paper.
Pre-heat oven at 200°C.
Method:
- Sift the cake flour and baking powder together into a bowl.
- In a mixing bowl, put in the butter and 100g of sugar. Using the paddle attachment, beat the butter and sugar until light and fluffy.
- Add in the egg yolks, one at a time and beat until it is incorporated. Add in the vanilla extract.
- At low speed, add in one third of the flour mixture and one third of the plain yoghurt alternately until done. Stop once mixture is well blended.
- In a separate clean bowl, whisk the egg white and 40g castor sugar until stiff. It's ready when the bowl is overturned and the egg white stays put.
- Fold in the egg white into the yolk and flour mixture until well blended. The batter may look a little curdled.
- Pour out the batter into the cake pan lined with baking paper.
- Reduce temperature to180°C - 190°C and bake for about 30-35 minutes or until a cake tester inserted into the centre of the cake comes out clean.
- Remove cake from oven and place it to cool on a wire rack for about 10 minutes before unmoulding. After unmoulding, remove the baking paper and leave to cool completely.

Saturday, November 26, 2011
Pumpkin Cupcakes

Here's another cupcake recipe adapted from the delightfully sweet Primrose Bakery's 'Cupcakes' cookbook. This time I chose Pumpkin Cupcakes. I just love to incorporate veggies in my bakes. It makes me feel less guilty and a little wee bit 'healthier'.
These cupcakes were nicely moist and soft. I left them unfrosted as I didn't want to add in extra calories. I bet they would've been even better with a creamy velvety cream cheese frosting. Ah, if only my ever expanding thighs permit!

So far the Primrose Bakery 'Cupcakes' cookbook have yet to dissappoint. I've tried 2 recipes, the Malted Cupcakes (Milo Cupcakes) and this Pumpkin Cupcakes. Both turned out satisfactorily moist and tender. But they may be a tad too sweet and you may need to adjust the sugar to suit your tastebud. I've reduced the sugar for the pumpkin recipe below.
Pumpkin Cupcakes
(Adapted from Primrose Bakery 'Cupcakes' cookbook)
(makes 12 regular cupcakes)
Ingredients:
- 110g butter
- 200g soft light brown sugar
- 2 large eggs
- 1/2 tsp vanilla extract
- 100g pureed pumpkin
- 125g self-raising flour
- 120g plain flour
- 1 tsp mixed spice
- 125ml buttermilk (or 120ml water mixed with 2 tbs buttermilk powder)
Method:
- Cream butter and brown sugar with an electric hand whisk until pale and smooth, which should take 3-5 minutes. Add the eggs one at a time, add vanilla extract, beating well after each addition. Then add pumpkin and beat until just combined.
- Combine and sift self-raising flour, plain flour and mixed spice in a bowl. Add 1/3 of the flours to the butter mixture and beat until just combined. Add 1/2 the buttermilk and beat again, then repeat these steps until all the ingredients have been added.
- Spoon the mixture into 12 cupcake cases, filling them to about 2/3 full. Bake at 180 C for about 25 mins until slightly raised and golden brown. Once cooked, remove from the oven and leave the cupcakes in their tins for about 10 mins before cooling on a wire rack.

Monday, November 21, 2011
Milo Cupcakes

We, especially Malaysians & Singaporeans grew up drinking Milo. It is a staple breakfast drink in most households and is served in all coffee shops. If you're reading and wondering what Milo is, it is actually a brand name of a chocolate malted drink. Heard of Ovaltine? But Ovaltine somehow is not as popular as Milo.
Instead of drinking that mug of Milo, how about eating one for a change ... a Milo cupcake? I made these Milo cupcakes the other day just for this month's Aspiring Baker's cupcake theme. I used a recipe adapted from the Primrose Bakery Cupcakes cookbook and frosted them with Swiss Meringue Buttercream. These Milo cupcakes were soft and moist and very Milo-y. Yummy! One little issue though, the crumb stuck to my teeth everytime I took a bite! I'm wondering whether this is because I've added too much Milo? The original recipe ask for half the amount I used. Hmmm .... anybody knows why?

Milo Cupcakes
Recipe adapted from Primrose Bakery Cupcakes cookbook
Ingredients:
110g butter, softened
120g soft brown sugar
100g caster sugar
2 large eggs
125g self raising flour
60g cake flour
100g Milo powder
125ml milk
1/2 tsp vanilla extract
1 tbs heavy cream
Method:
- Preheat the oven to 160C and line a 12 hole muffin tin with paper cases.
- In a large mixing bowl cream together the butter and the sugars until pale and smooth.
- Add the eggs one at a time, mixing into the mixture between additions.
- In a separate bowl, sift and combine together the flours and Milo powder.
- Mix the milk together with vanilla extract and heavy cream.
- Add 1/3 of the flour to the creamed butter/sugar mixture. Beat well until combined. Then, add 1/3 of the milk mixture and beat again. Repeat this step until the last of the flour and then the last of the milk, beating well between additions.
- Spoon the mixture into the paper cases. Fill about 2/3 full.
- Bake for about 25 mins until golden brown or until a skewer inserted comes out clean.
- Remove from the oven and leave to cool in the tin for 5-10 minutes.
- Then turn out to cool completely on a wire rack.
Note:
I bake the cupcakes in small size muffin tins and yielded 28 cupcakes which took 20 minutes to bake.
Swiss Meringue Buttercream
(Recipe adapted from Table for 2 or more)
Ingredients:
2 egg whites
100gm sugar
170gm unsalted butter, lightly softened
Method:
- Put the sugar and egg whites in a large heatproof bowl over a saucepan of simmering water and whisk constantly until the sugar is completely dissolved and temperature has reached 65C. The mixture will look like marshmallow cream. Remove from stove.
- Pour meringue into a mixing bowl. Beat the meringue on medium speed until it cools and forms a thick shiny meringue, about 5 minutes.
- Now add in add the butter, one tablespoon at a time, beating until smooth. Mixture will be soupy and maybe curdled. Do not worry. It will come together nicely in the end. Carry on beating on medium-high speed until it is thick and very smooth, approximately 6-10 minutes.

I'm submitting this post to Aspiring Baker's #13: Enjoy Cupcakes! (November 2011) hosted by Min of Min's Blog.
Saturday, November 12, 2011
Fudgy Wudgy Okara Brownies
If I don't tell, you probably wouldn't have known these fudgy wudgy brownies contain okara. Okara is a by product of soy beans, the pulpy mass leftover from straining soy bean milk. If you make soy bean milk at home, don't throw the okara away. Make these and you'll be glad you've saved it!
Well, my Daughter obviously didn't suspect a thing. She enjoyed the brownies so much and even helped herself to seconds. If only she knew. But she did! I accidentally leaked out the 'secret ingredient' while talking to dear Hubby. This fazed her a little but she soon forgotten about it and reached out for the leftovers. Really, these brownies don't taste beany at all and it's really quite hard to believe they contain okara! Hehehe! Who would have thought something so good and healthy can be so yummy (in the form of a brownie of course!).

After much browsing and researching, I decided to use a vegan recipe from Vegan Feast Kitchen as it seems to be quite a popular one where okara brownies are concerned. Being a vegan recipe, it calls for egg replacement glop and for non-vegans like me this is really quite unheard of! So I used REAL eggs instead, and REAL butter in place of the Earth Balance which is actually margarine.
Here it is, the recipe, de-veganised (if there's such a word!).
FUDGY WUDGY OKARA BROWNIES
Makes 14 cupcake squares
Ingredients:
4 Eggs
2 cups Brown sugar
3/4 cup, packed well-squeezed Okara (soybean pulp from making soymilk)
4 oz (1/2 cup) melted Butter
1/4 cup Water
2 teaspoons Vanilla extract
1 1/4 cups unsweetened cocoa powder
1/2 cup plain white flour
1/4 teaspoon salt
1/2 teaspoon baking powder
1 cup chopped nuts (walnuts, pecans, or other favorite nuts)
Method:
Notes:
Well, my Daughter obviously didn't suspect a thing. She enjoyed the brownies so much and even helped herself to seconds. If only she knew. But she did! I accidentally leaked out the 'secret ingredient' while talking to dear Hubby. This fazed her a little but she soon forgotten about it and reached out for the leftovers. Really, these brownies don't taste beany at all and it's really quite hard to believe they contain okara! Hehehe! Who would have thought something so good and healthy can be so yummy (in the form of a brownie of course!).

After much browsing and researching, I decided to use a vegan recipe from Vegan Feast Kitchen as it seems to be quite a popular one where okara brownies are concerned. Being a vegan recipe, it calls for egg replacement glop and for non-vegans like me this is really quite unheard of! So I used REAL eggs instead, and REAL butter in place of the Earth Balance which is actually margarine.
Here it is, the recipe, de-veganised (if there's such a word!).
 |
| Okara |
Makes 14 cupcake squares
Ingredients:
4 Eggs
2 cups Brown sugar
3/4 cup, packed well-squeezed Okara (soybean pulp from making soymilk)
4 oz (1/2 cup) melted Butter
1/4 cup Water
2 teaspoons Vanilla extract
1 1/4 cups unsweetened cocoa powder
1/2 cup plain white flour
1/4 teaspoon salt
1/2 teaspoon baking powder
1 cup chopped nuts (walnuts, pecans, or other favorite nuts)
Method:
- Preheat the oven to 150C. Line a 12 hole square muffin pan with cupcake liners.
- In a mixing bowl, beat eggs together with brown sugar until thick and foamy. Add vanilla, water, melted butter and okara. Combine well.
- In another bowl, mix together the cocoa powder, flour, salt and baking powder. Sift into the wet mixture. Fold and stir briefly, just to blend. Do this in batches. Fold in the nuts.
- Scrape the batter into the prepared muffin pan until almost full and bake for about 40 minutes or until skewer comes out clean.
Notes:
- Baking time is just a guideline . Your oven may need less or more time.
- If you prefer, use a 9 inch square baking pan and line with non-stick parchment paper (with over hang on the sides for easy removal). Bake for about 50 minutes. Leave to cool on a rack. Do not cut until the brownies are cool. You can lift the whole thing out of the pan, using the parchment liner, onto a cutting board.
Sunday, October 2, 2011
Carrot Cupcakes

Sometimes I can be a little mad, obsessed even. You see, I've been on a quest to find the perfect carrot cake recipe for the longest time and this particular carrot cake recipe, I've made it not once, not twice but three times!
The first time, I made it into cupcakes, I was quite happy with the result but thought they were a little too oily and the spice were a little much. The second time round, I reduced the oil and adjusted the spice flavouring, the texture came out a little dry. Not wanting to give up, I gave it a go again. This time keeping the original amount of oil and adjusting the spice only, and instead of cupcakes I made a 2 layer 8 inch round cake. Though the flavour was good, it was a little dry. *Sigh*
Alas this recipe was not meant to be all I'd hope for. Maybe I'm just too fussy. A perfectionist, maybe. Will I ever find that darn perfect carrot cake recipe? All I'm looking for is a carrot cake loaded with carrots which is not too spicy, not too sweet, not too oily, does not reek of bicarb, not too dense and most importantly moist but not overly wet. Am I asking too much? LOL.
Even though this carrot cake may not be the holy grail of carrot cakes in my book, but you know what I'd still give this recipe a go, but in cupcake form only. It seems to have the best texture this way.

P/S - The cream cheese frosting from Martha Stewart was perfect. Creamy and just the right level of sweetness.
Carrot Cake
(adapted from Cake Mistress here)
Ingredient
1 cup Brown Sugar (about 150g)
1 cup Vegetable Oil
3 Large Eggs
Pinch Salt
1/2 teaspoon Bicarb of Soda
2 cups Self Raising Flour (240g)
2 cups finely grated Carrot (200g)
1/2 cup Walnuts, finely chopped (about 50g)
3/4 teaspoon Cinnamon
3/4 teaspoon Nutmeg
1 teaspoon vanilla extract
Cream Cheese Frosting
(adapted from Martha Stewart here)
Ingredient
250g cream cheese, room temperature
115g unsalted butter, cut into pieces, room temperature
125g confectioners' sugar
1 teaspoon pure vanilla extract
125g confectioners' sugar
1 teaspoon pure vanilla extract
zest of 1 orange, finely grated
Method
To make cake:
1) Heat oven to 180 degrees Celsius.
2) Beat sugar and oil until thick, then add 1 egg at a time and keep beating for a few more minutes.
3) Add salt, bicarb soda, carrots, flour, walnuts and spices. Mix with wooden spoon until all combined.
4) Pour batter evenly between cupcake pan. Bake for 15-20 minutes, or until light golden and cake springs back when touched in the middle. Baking time might vary depending on your personal oven.
To make frosting:
Place butter and cream cheese in a mixing bowl. Beat until smooth and well blended. Sift in confectioners' sugar, and gradually beat until smooth. Add vanilla and orange zest, stir to combine.
Friday, September 23, 2011
Spongy Banana Cake
I have been captivated by this Spongy Banana Cake (from Wen's Delight here ) the first time I saw it. It seems this cake is very popular among asian bloggers and has received many prasies. So, does it live up to it's name?
Here it is, fresh out from my oven.

Spongy, yes!
It turned out beautifully. As it cooled, it didn't shrink or sink in the middle as I thought it would - as what happened to most of my sponge cakes. Really beyond my expectation. Spongy, moist and airy. Good to eat with a cup of tea.
Spongy Banana Cake
(Recipe adapted from Wen's Delight here )
Ingredients:
150g Eggs (Room temp - About 4 large eggs)
130g Sugar
200g Banana (mashed)
150g Cake flour
1/2 tsp Baking powder
1/4 tsp Baking soda
100g Vegetable oil
1/4 tsp Rum
1/2 tsp vanilla
Method:
1) Preheat oven to 160 degree C.
2) Grease & line a 8" round tin with baking paper.
3) Sieve flour, baking powder & baking soda together. Sieve twice & set aside.
4) Whisk eggs, sugar & banana at max speed till stiff/ribbon stage.
5) Gently fold in flour gradually.
6) Take 1/3 of the batter, mix with the veg oil. Then, pour back into the remaining batter and combine well till batter is shiny & flowing.
7) Bake for 40 - 45mins.
8) Remove from oven. Leave to cool for 5 minutes then turn out, remove baking paper and cool completely on wire rack.

Here it is, fresh out from my oven.
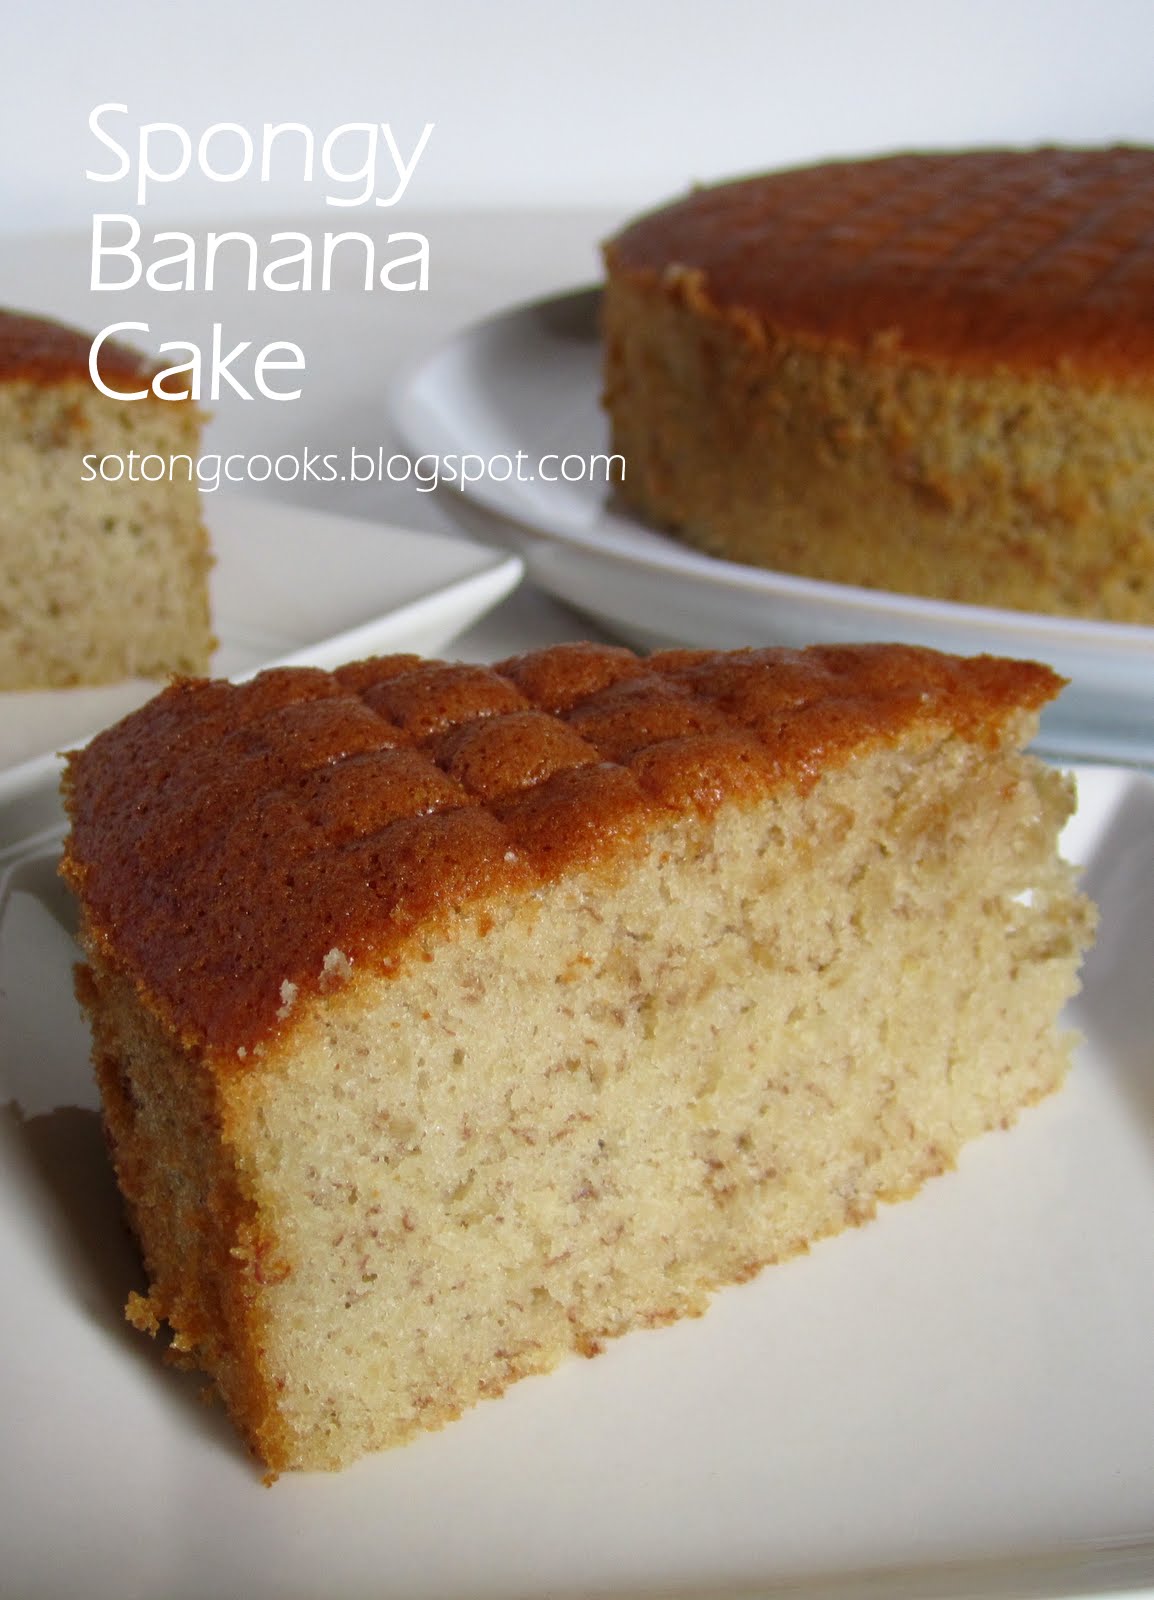
Spongy, yes!
It turned out beautifully. As it cooled, it didn't shrink or sink in the middle as I thought it would - as what happened to most of my sponge cakes. Really beyond my expectation. Spongy, moist and airy. Good to eat with a cup of tea.
Spongy Banana Cake
(Recipe adapted from Wen's Delight here )
Ingredients:
150g Eggs (Room temp - About 4 large eggs)
130g Sugar
200g Banana (mashed)
150g Cake flour
1/2 tsp Baking powder
1/4 tsp Baking soda
100g Vegetable oil
1/4 tsp Rum
1/2 tsp vanilla
Method:
1) Preheat oven to 160 degree C.
2) Grease & line a 8" round tin with baking paper.
3) Sieve flour, baking powder & baking soda together. Sieve twice & set aside.
4) Whisk eggs, sugar & banana at max speed till stiff/ribbon stage.
5) Gently fold in flour gradually.
6) Take 1/3 of the batter, mix with the veg oil. Then, pour back into the remaining batter and combine well till batter is shiny & flowing.
7) Bake for 40 - 45mins.
8) Remove from oven. Leave to cool for 5 minutes then turn out, remove baking paper and cool completely on wire rack.

Saturday, September 10, 2011
Pavlova

This is my first ever pavlova. It turned out beautifully... except for the cracks. I didn't know the shell would be so delicate. It cracked easily when I tried to remove the baking paper. In the end, I got scared and gave up, and left the baking paper paper still intact. I just trimmed off the excess baking paper around edges. Anyway, this made a showstopping dessert on a recent family gathering. Dressed up with billowy whipped cream and piled high with strawberries, kiwis and white peaches, the otherwise unassuming plain pavlova shell looked mighty grand. The shell was crisp and the inside soft, light and marsmallowy. I only wish it hadn't been so sweet. Thankfully generously toppings of whipped cream and fresh fruits counteracted the sweetness somewhat. I imagine a tart passion fruit sauce drizzled all over would be fantastic. Or maybe a zippy lime curd, it would go so well with the oh-so-sweet pavlova.
For anyone who's looking to make a pavlova, this is a good recipe to try. Very simple. I guess I also owe it to this helpful tip that my pavlova didn't end up a weeping mess - which is to make sure the sugar is dissolved completely when beating the egg whites. Now I just wonder, how do you remove the pavlova from the baking paper without cracking it. Tips, anyone?
 |
| The beaten meringue all thick & glossy and ready to be bake. |
(Recipe adapted from Best Recipes here )
Ingredients:
4 egg whites
1 cup (250ml) sugar
1 tsp lemon juice or vinegar ( I used apple cider vinegar)
2 tsp cornflour
Method:
1) Whisk egg whites until frothy. Add all the rest of the ingredients and continue whisking until very glossy and thick and stiff. Make sure all the sugar has dissolved - feel by rubbing between fingers. It should feel smooth and not grainy.
2) On a baking paper lined tray, pile on the meringue, shape the meringue into a large centre with a slight hollow in the centre.
3) Bake in a preheated oven at 130 C for 1 1/2 hours or until crisp on the outside. Turn off oven and leave the pavlova to cool in the oven with the door slightly ajar.
4) Generously pile on whipped cream and fresh fruits just before serving. Done!

Friday, August 26, 2011
Rustic Free Form Pear Tart

If you're like me who thinks all things pastry in general are a pain to make, this free form rustic tart may just change your mind! This is one easy and delicious tart to make at home. I especially like the fact that I don't need to line a tart tin let alone needing one, but just roll the pastry into a rough circle and fold up the edges. And it's okay if it's uneven and knobbly, because rustic and homey is what we want. I've got to say, I'm pretty pleased with this pear tart. It didn't get soggy like what I expected - the filling was oozing pear juices and was bubbling away during baking. Instead, the crust was deliciously buttery and crisp. The pears all soft and fragrant and the juices thicken up nicely upon cooling. A delight to eat and eat..... and eat.
I am submitting this to Aspiring Bakers #10: Easy as Pie (August 2011), hosted by Janine of Not the Kitchen Sink! If you would like to join, please see details here.
Rustic Pear Tart
Recipe adapted from here for the pastry and here for the filling.
Ingredients
Shortcrust Pastry:
250g plain flour
125g salted butter, chilled, finely chopped
80g icing sugar
2 egg yolks, chilled
1 tbs water, chilled
Filling:
3 medium pears
Method
For the pastry:

Sunday, August 21, 2011
Basic Chiffon Cake
 |
| Great for making layered cakes. |
To my dear cousin Feli,
Here's the basic chiffon cake recipe you asked for.
This cake is soft, moist, fine textured and fluffier than other chiffon recipes I've tried. It freezes well too. The trick is to whip the egg whites until glossy and almost stiff. It's ready when the bowl is overturned the whites will not fall off. Bake at the lower rack of your oven and if you find your cake cracking, try baking at a lower temperature.
Have fun trying!
P/S Now, where's that scrummy cornflakes cookie recipe you promised? LOL
Ingredients:
- 4 egg yolks
- 80 ml water
- 70g caster sugar
- 1/2 tsp salt (reduce to 1/4 tsp if u like)
- 120g self raising flour
- 1/2 tsp vanilla essence
- 1/2 cup (125 ml) corn oil
- 4 egg whites
- 1/2 tsp cream of tartar
- 70g caster sugar
Method:
- Preheat oven at 160C.
- Beat egg yolks, sugar and salt until sugar dissolves completely. Then, add water, vanilla, oil and self raising flour. Mix well.
- In a clean mixing bowl, whisk egg whites until frothy. Add in the cream of tartar and 1/3 of the 70g caster sugar. Whisk until sugar dissolves before gradually adding in the rest of the sugar. Continue whisking until egg whites form stiff peaks and shiny and would not fall off the bowl when overturned.
- Take a 1/4 of the beaten egg whites and fold in to the egg yolk mixture to lighten the batter. Gently fold in the rest of the egg whites until well combined (until you see no streaks).
- Pour batter into an 8 inch round deep cake tin with removable base or springform tin (no need to grease or line).
- Bake at lower rack of the oven for 40-50 minutes or until skewer comes out clean when plunged in the middle of the cake.
- Cool inverted on a wire rack. Remove cake from tin when cake is cooled completely.
Friday, August 12, 2011
Mazarin Tarts
Almond
,
Aspiring Bakers
,
Baking
,
Swedish
,
Tarts
No comments
:
Mazarin tarts are small Swedish almond tarts, oval shaped with a tender buttery crust and an even more buttery and moist cake-like almond filling, topped with sweet icing sugar glaze. Very fattening & rich but I absolutely love these delectable tarts and eating just one is never enough for me - I don't care even if they add extra inches to my thighs! Unless I fly to Sweden, the only place I could get them is from Ikea Stores in Singapore and KL, both of which are sadly thousands of miles away across the South China Sea from my place. Fortunately, I have a kind aunt who brings these tarts over whenever she comes to visit, but unfortunately, she does not visit often enough. Thus, savouring these tarts is just a once-a-year indulgence for me. Not enough I say.

I have bookmarked this Mazarin recipe for the longest time and had told myself to make many times over, but I just never did. Honestly, to me pastry in general is such tedious work - a real challenge to my lazy bones, not to mention the most unconducive hot weather we're experiencing these days! However much I dread pastry making, I do not want to miss out this month's Aspiring Bakers (everyone is challenged to make pies and tarts and all things pastry), and for my entry I'd like to finally give this Mazarin recipe a try. And boy did all that 'hard' work paid off! My homemade tarts were deliciously buttery and utterly moist with a bright hint of refreshing orange zest. Totally yum! What's more, my opinionated Mom raved about them and said they were better than those from Ikea!
*Smug smile*
I am submitting this to Aspiring Bakers #10: Easy as Pie (August 2011), hosted by Janine of Not the Kitchen Sink! If you would like to join, see details here.
Mazarin Tarts

Crust:
150g flour
80g sugar
110 g butter
1 egg yolk
150g flour
80g sugar
110 g butter
1 egg yolk
1 tsp rum
Filling:
Filling:
100g butter
100g sugar
2 eggs
150g ground almonds
finely grated zest of 1 orange
finely grated zest of 1 orange
Glaze:
150g icing sugar
about 3 Tbs water
Method:
Make tart crust:
Using a food processor, blitz the flour, sugar and butter together until crumbly. Add the lightly beaten egg yolk and rum and blitz again, just until dough forms. Tip the dough out, gather into a ball then flatten into a disk. Wrap the dough/disk in cling wrap and place in refrigerator to rest & firm up for at least half an hour. Pinch a small ball of dough and press evenly into each tart tins.
Make Filling:
Beat the butter and sugar until pale and fluffy, then add the eggs one at a time, beating thoroughly. Mix in grated orange zest and then gently fold in the ground almonds. Fill the tart shells with the almond batter, smooth surface and then bake in the oven at 175 °C for about 20 minutes or till the tops turn a crisp golden brown and skewer comes out clean when tested. Wait till the tarts cool before glazing - the filling is likely to sink slightly during cooling.
Make Glaze:
For the glaze, mix 3 tablespoons water with the icing sugar to a spreadable consistency. With the back of a spoon thinly cover the the tops of the cooled tarts with glaze. Let the glaze set and harden.
Subscribe to:
Posts
(
Atom
)